Creating water effects in Mega Voxels can make your artwork go from good to better. After you master this skill you can create voxels for areas of water like fish bowls and ponds. In this tutorial we will show you a way to simulate the look of water using a simple transparency technique in Mega Voxels.
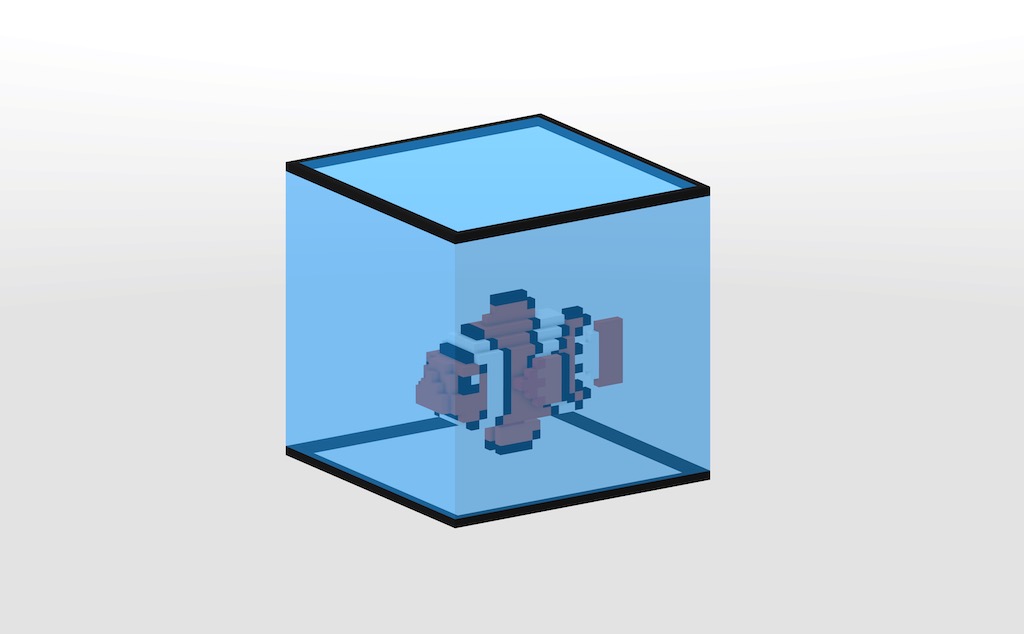
Water is a very common when making your own voxel art scenes. Whether its creating a pond for a nature scene or even an aquarium in a city, knowing how to create voxels that look like water is a must. You may have asked yourself the question, how do I make water in Mega Voxels? Fortunately, Mega Voxels allows you to create transparent voxels that look just like water. When you change the colors you can easily make water voxels to enhance your scene. Well cover the steps on how to make these transparent voxels and even mix them with solid voxels to create your own water effects.
This tutorial supports Mega Voxels 1.1 or newer. If you need help installing Mega Voxels, view our previous tutorial How to Install Mega Voxels. There you can find a step by step tutorial on getting Mega Voxels running on your device.
Getting Started
For this tutorial we will create an aquarium that has water inside of it, and to demonstrate the transparency we will also add a voxel fish model. We will first start off by building the aquarium structure and then we’ll cover how to add your own fish models into it to create your very own aquarium.
Create a Voxel Aquarium for the Water
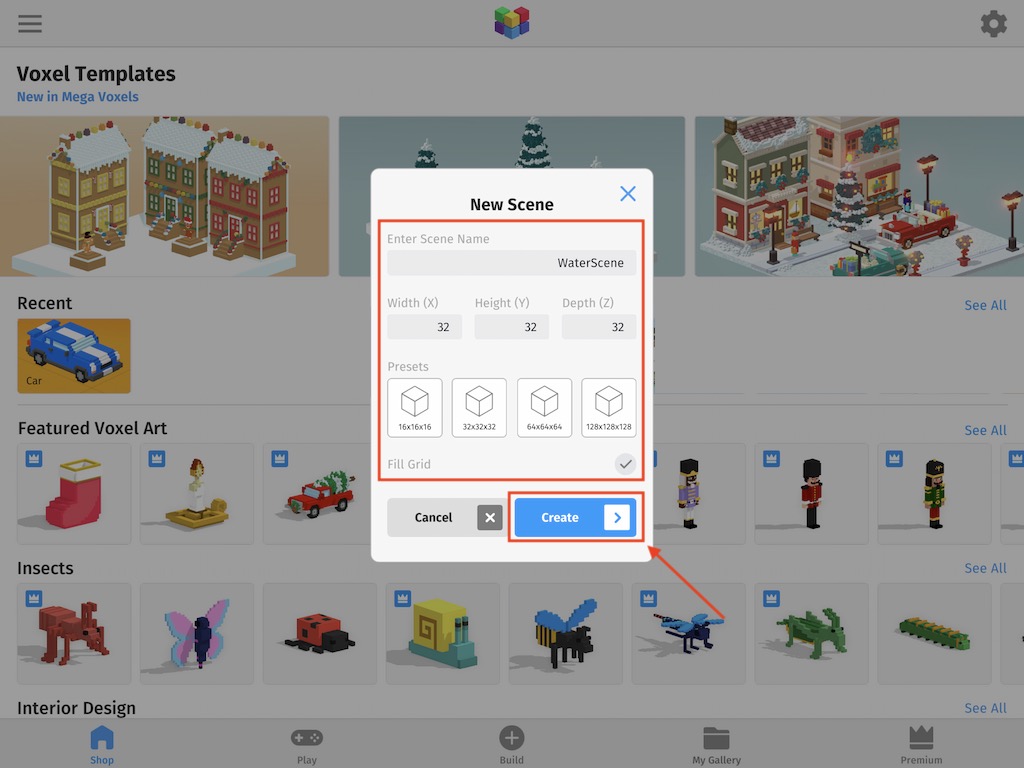
So first open up the Mega Voxels app. At the bottom tap on the button that says Build. On the New Scene menu, go ahead and enter the following values into each of the fields. We will call our scene “WaterScene” and set the size of the default grid to “32x32x32”. Lastly we will make sure that Fill Grid is selected so that our default grid is filled with voxels. When ready press the Create button.
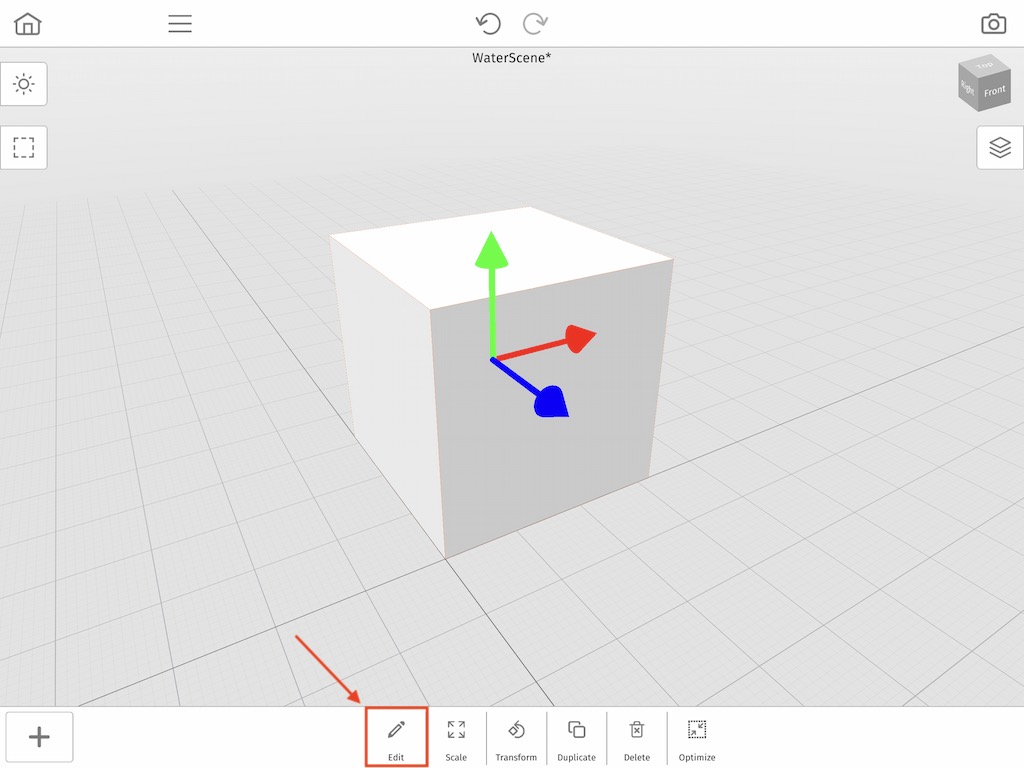
So you should now see a gray cube in the middle of your screen. This is the default grid that gets created when you create a new scene. We will use this as the main structure for our Aquarium. To make it look more like a fish tank let’s change the color and add transparency. To do this, begin by tapping on the model. In the context menu tap on the Edit button like the picture below.
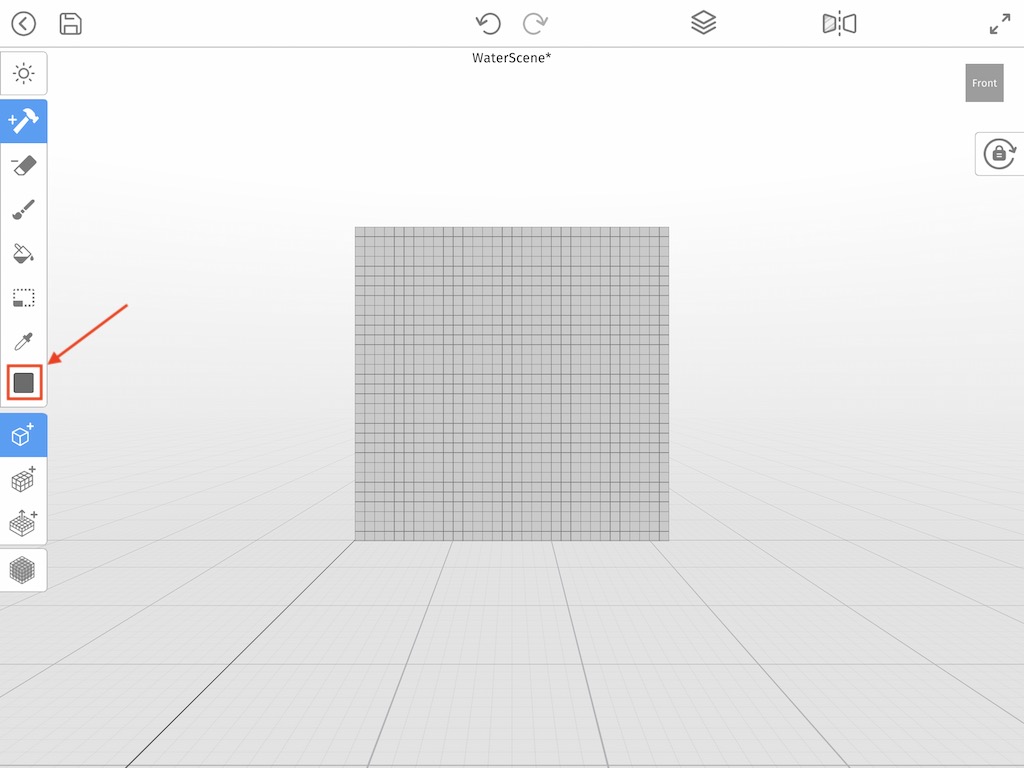
First we are going to change the color. To do this tap on the Color box on the left side of the screen.
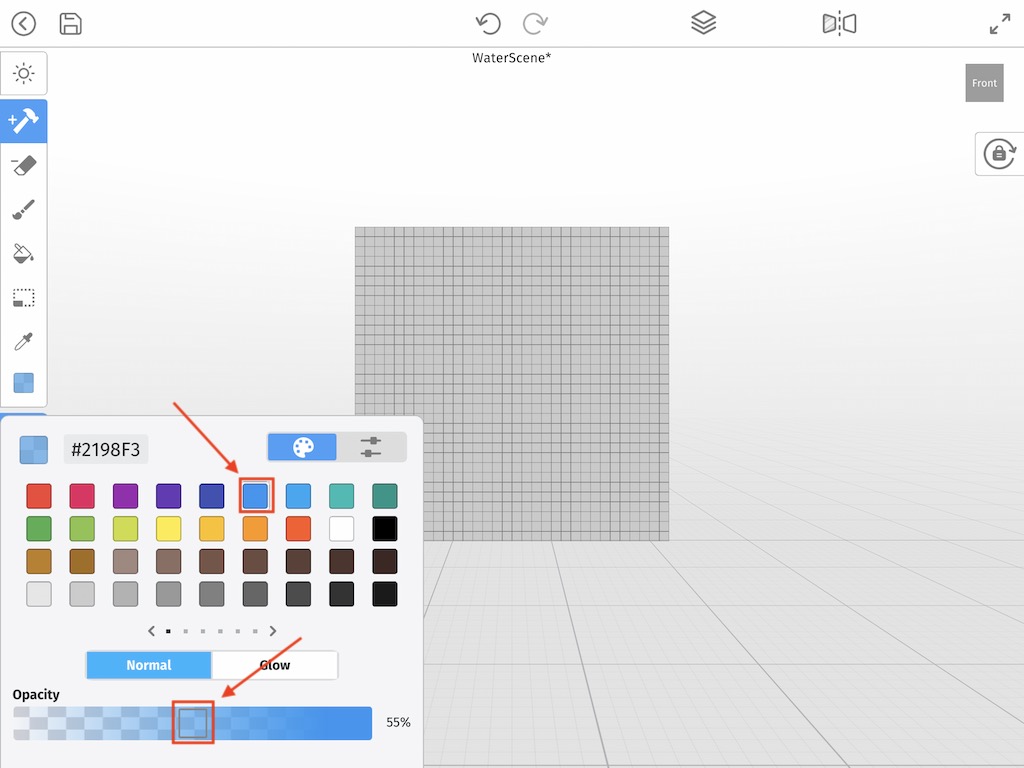
When the Color window opens we are going to select the pre-made blue color at the top of the color window. This color will serve as the main color for our water. Then to make it transparent simply tap and drag on the slider, titled Opacity, at the bottom to 55%.
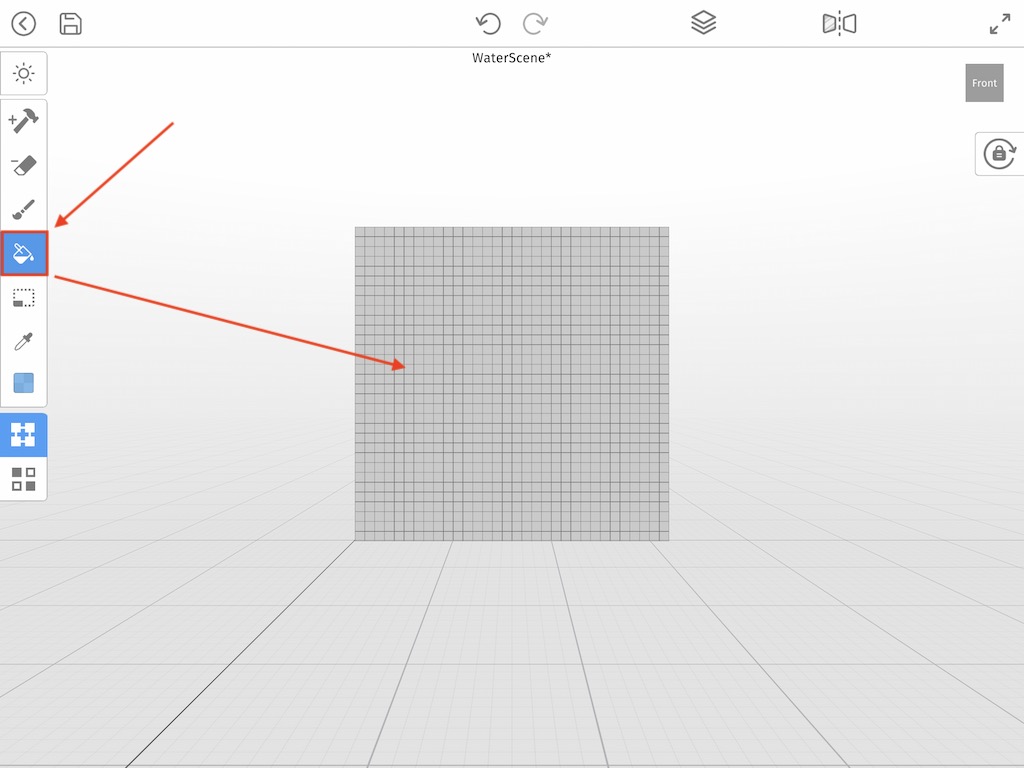
When you are finished simply tap the main editor window and the Color window will collapse. Now a fast and easy way to color all the voxels in your grid is to use the Paint Bucket tool on the left side in the tool bar. When it is selected simply tap any where in your grid.
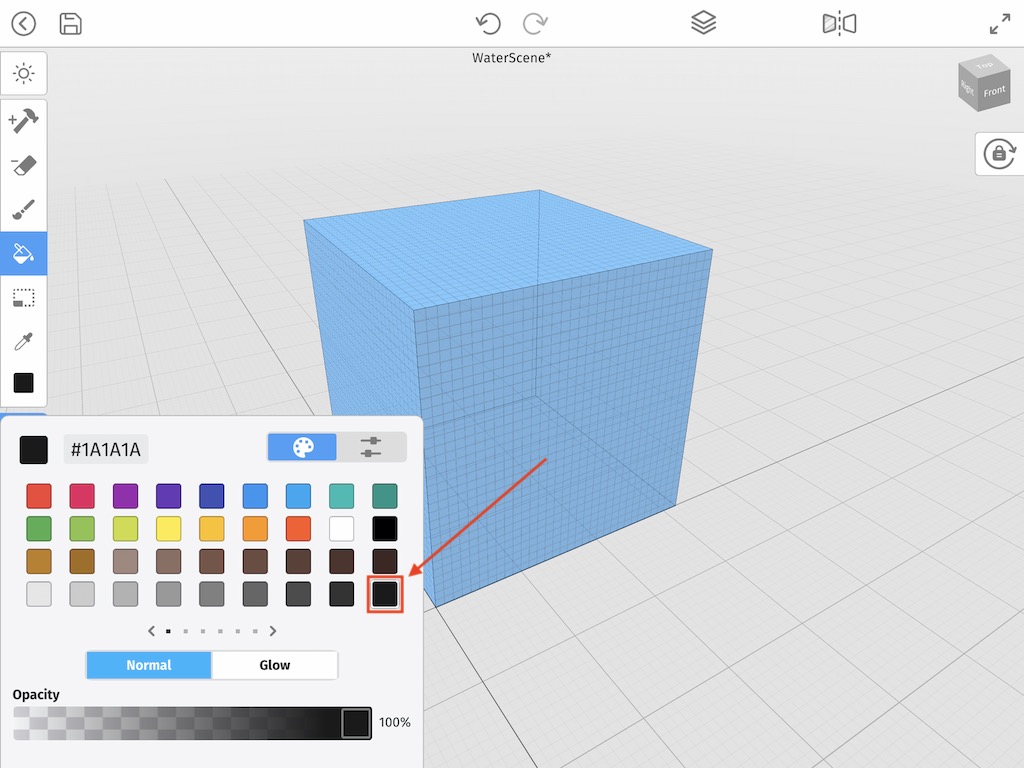
Great! You now have a grid full of transparent voxels. This is good, but it looks unrealistic. Most fish tanks have metal borders to hold the glass together. The good news is, in Mega Voxels you can combine transparent voxels with solid color voxels. So to do this, go ahead and tap the Color box again. This time let’s select a dark gray color that will represent the borders. Also make sure that the Opacity is set to 100% because we do not want our borders to be transparent.
To color our borders, we will use the Paint tool in the toolbar. Then we will select the Box Mode brush to speed up coloring our borders.
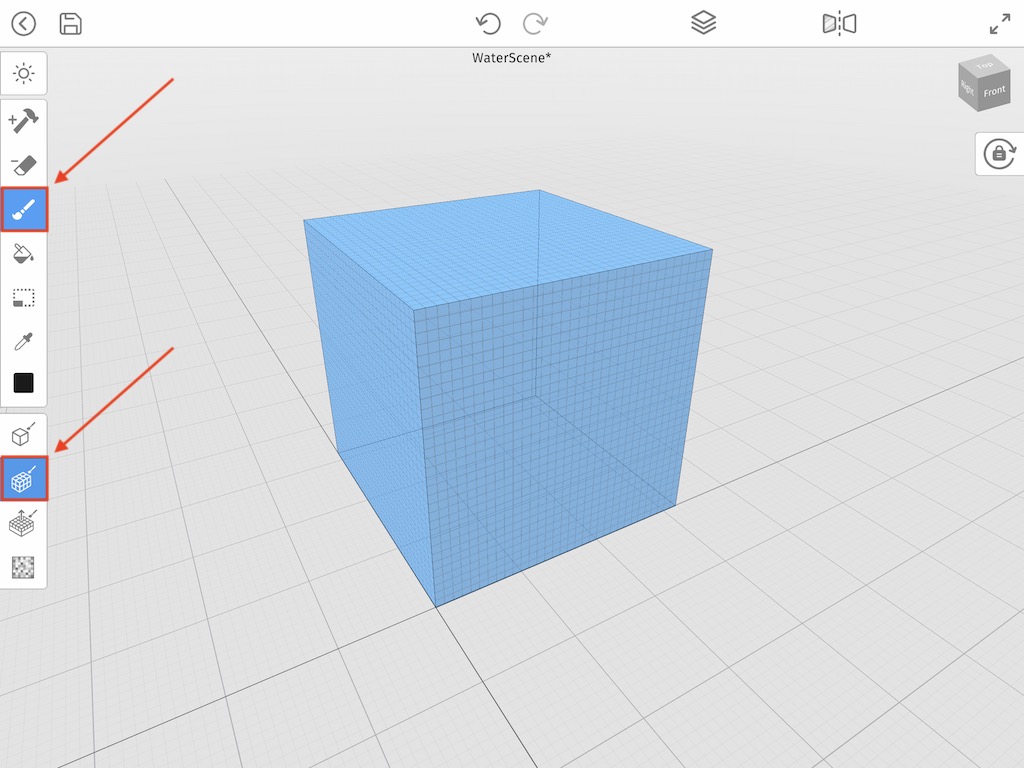
To paint the borders simply tap and drag. Try to replicate the image below. When you are finished tap the Back arrow to return to World Mode.
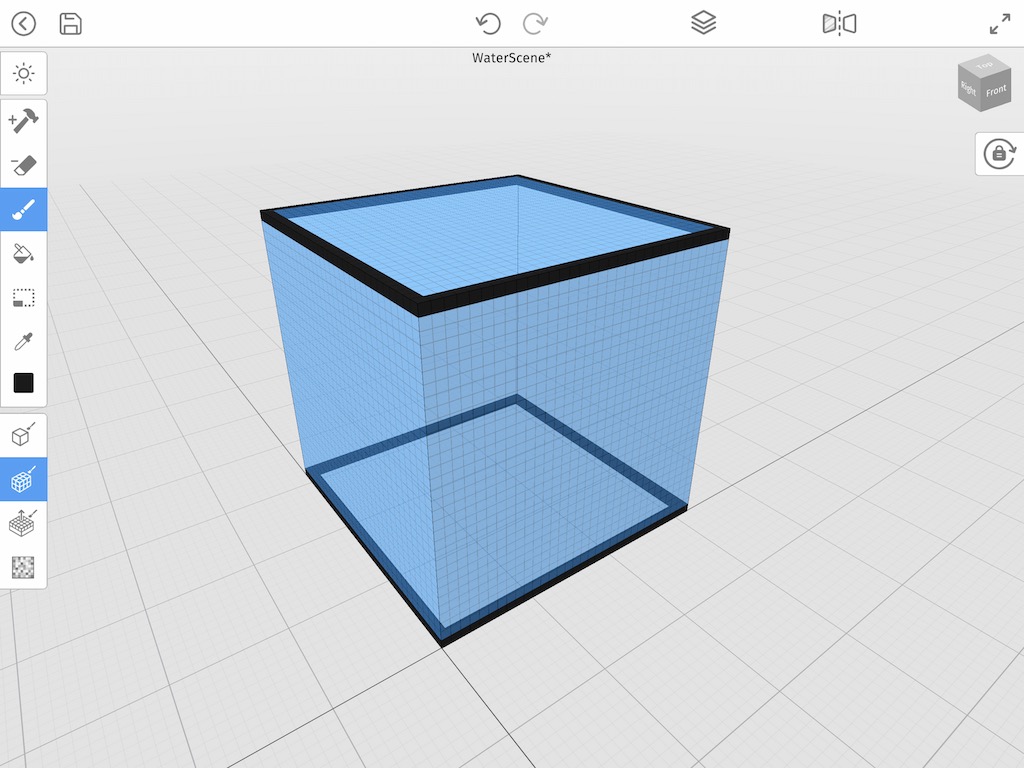
We are now ready to add a fish to our newly created aquarium.
Add a Voxel Fish to the Aquarium
Now our aquarium is starting to look really good, except we have no fish! Next we will be adding a fish to our scene. To do this tap on the Add Model button at the bottom of the screen.
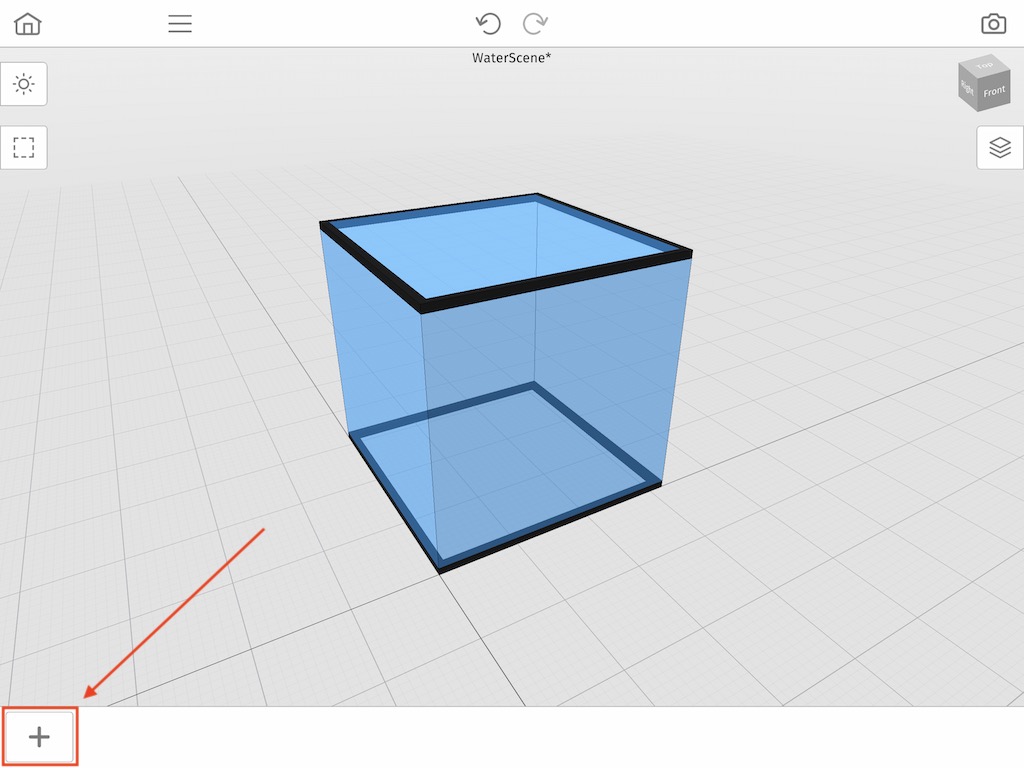
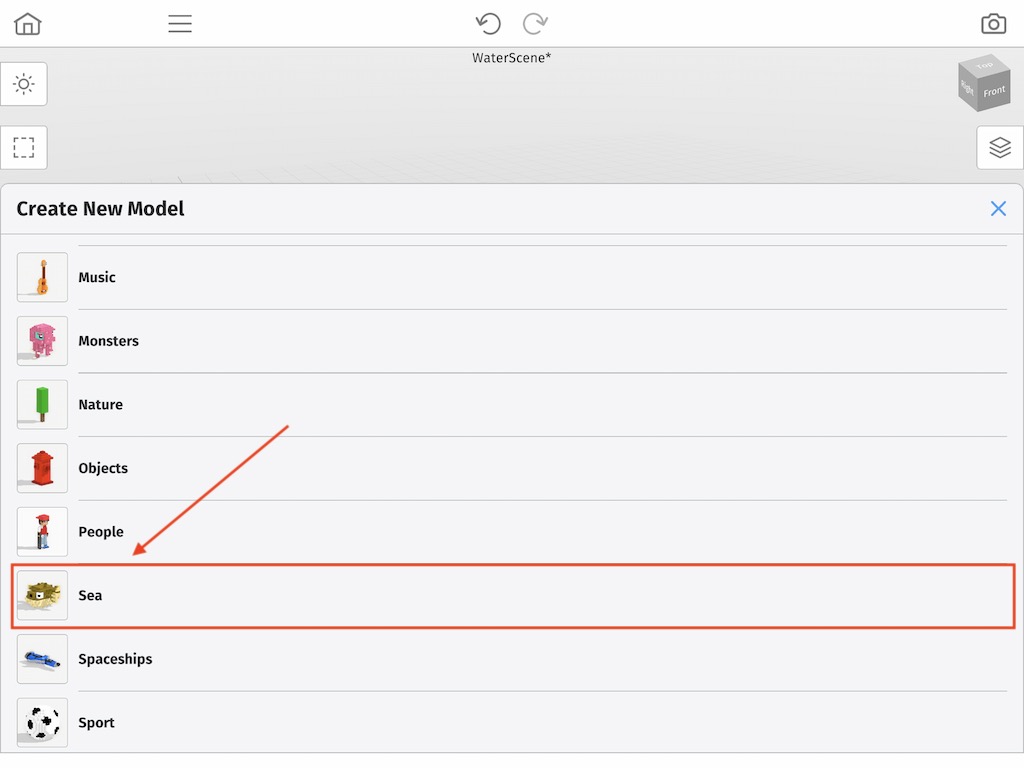
An awesome feature of Mega Voxels is that you have access to hundreds of pre-made voxel models. We will use a fish model that you can find by scrolling down until you find the Sea category.
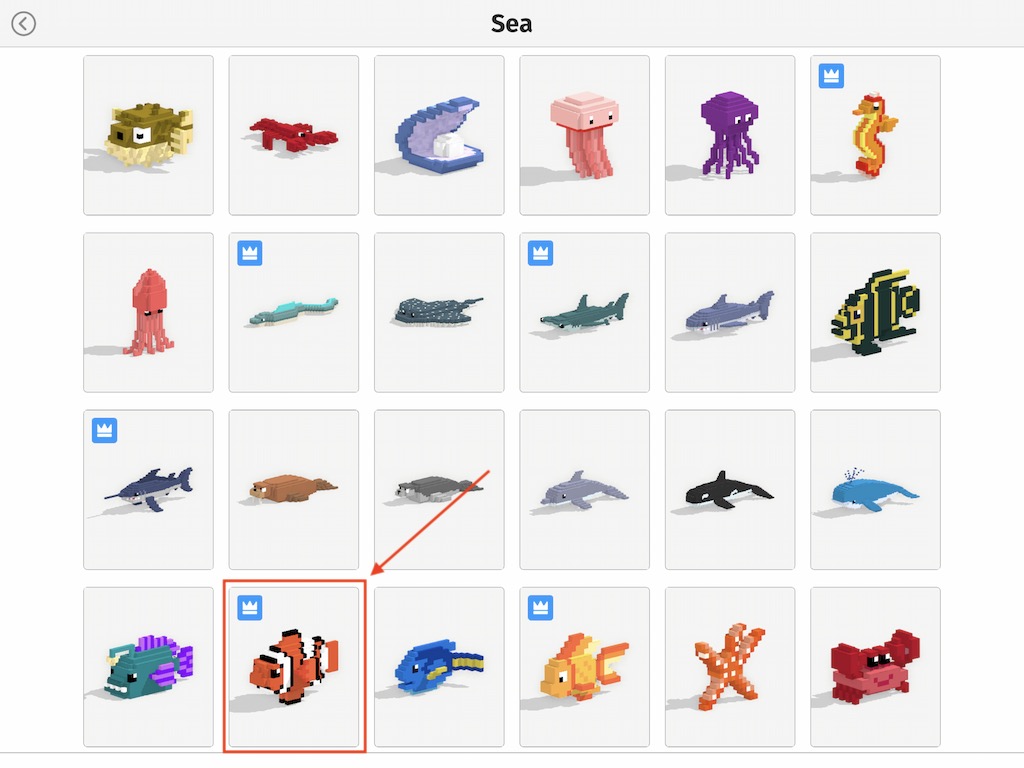
Once you are in the Sea category scale down until you find the Clown Fish. Simply tap on it to select it.
Once you do this your voxel fish will be added to your scene. You can move it around however you like. Notice how the aquarium we made earlier is transparent so it looks like our fish is in a fish tank.
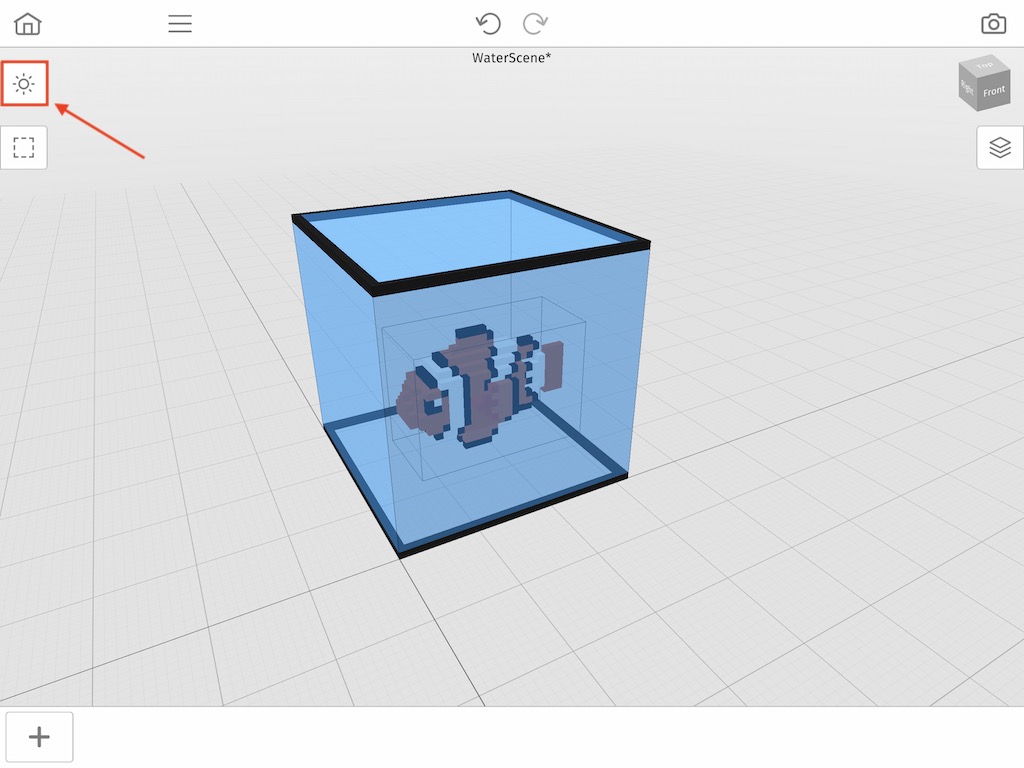
This is awesome, however there is one more little feature we want to change so that it is perfect. Most Voxel Art looks better when the camera is Orthographic because the angle of the art looks more like a straight edge as opposed to vanishing point you see in Perspective view. To Change this lets open the Scene Settings on the top left of the screen.
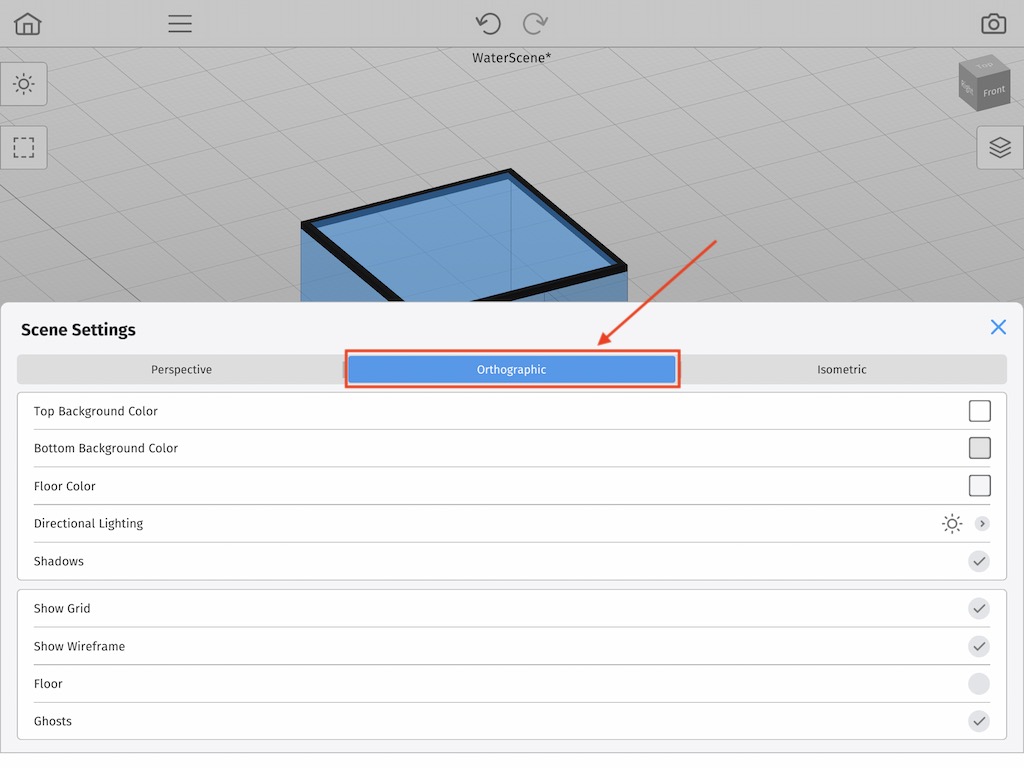
To change the camera type that we see, simply tap on the segment control that says Orthographic instead of Perspective. Tap the X button when you are done.
As you can now see our Voxel Art looks nice and even thanks to the Orthographic camera view.
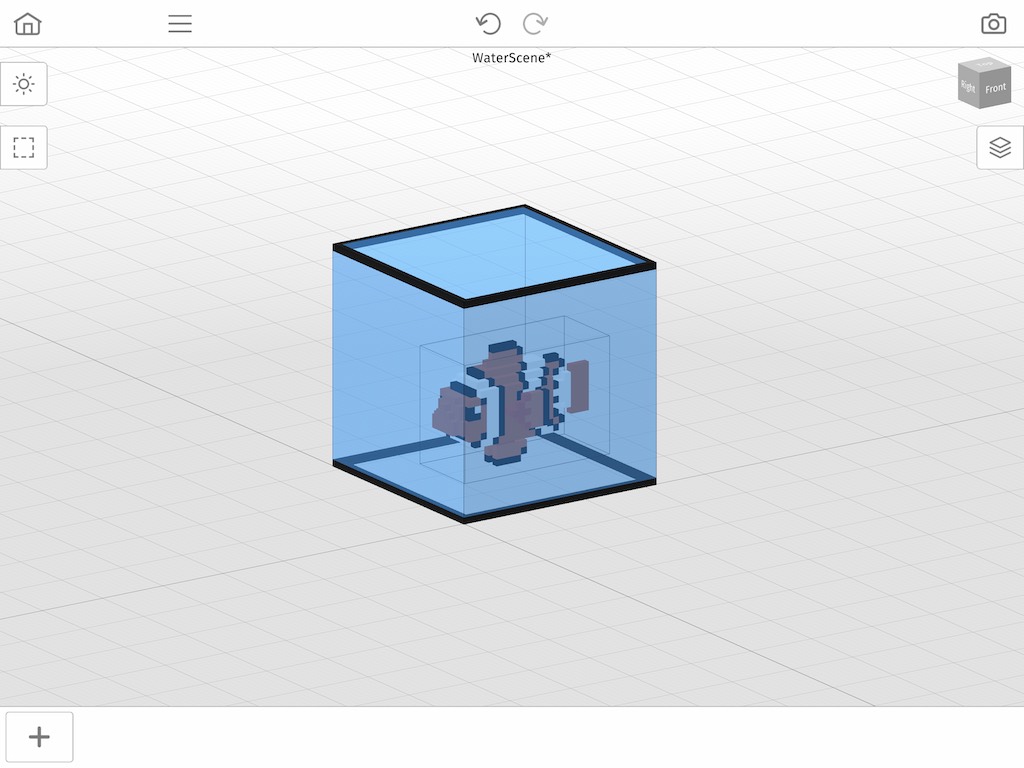
Here is a render of our final scene with the fish model in the aquarium with no grid-lines.

Where to go from Here
Now that you know how to make water effects in Mega Voxels, you can use this to create lakes, ponds, pools and more. Let us know if you have any questions.
