In this beginner pixel art tutorial you will learn how to create pixel art to use in your projects and games using the Mega Voxels app! We will cover everything from creating a pixel art image to sharing it on social media!
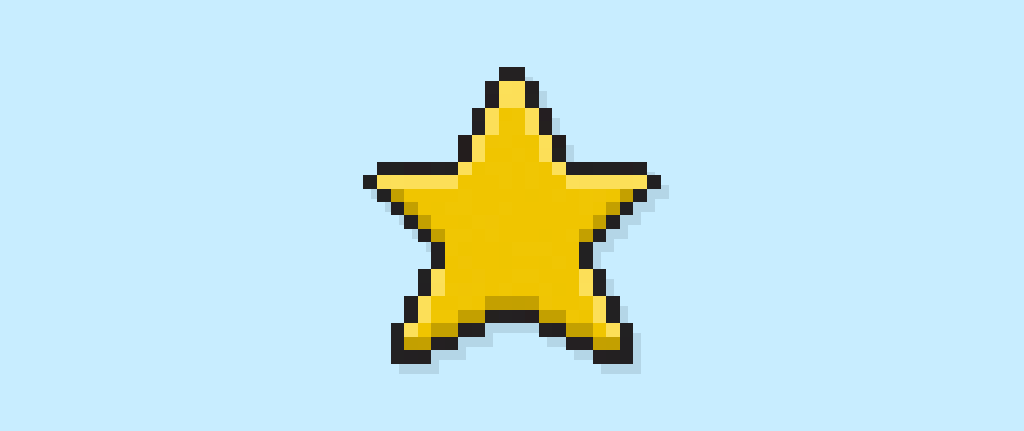
Do you want to create your own pixel art? Whether you are aiming to make something fun to share on your Instagram account or maybe you need a pixel art sprite for your next video game, this Mega Voxels tutorial will help you build pixel art fast with Mega Voxels.
Getting Started
Pixel art is a fast and easy way to create 2D images for your games or art projects like the amazing photos you see on Mega Voxels! This is one of the many reasons why artists and designers love drawing with pixels. As of this writing there are several tools available for making pixel art, but in this tutorial we will be using the latest pixel editor available on the App Store and Google Play. The Mega Voxels Pixel Editor is a fun and easy way to start drawing pixel art because of its many features! Best of all, its Free!
Once you have Mega Voxels installed, go ahead and open up the app on your device.
How to Create a Pixel Art Image
Now that you have the Mega Voxels app, we will show you how to create your first pixel art image! In this tutorial we will draw a pixel star that you can use in your projects such as video games.
Creating a New Pixel Art Canvas
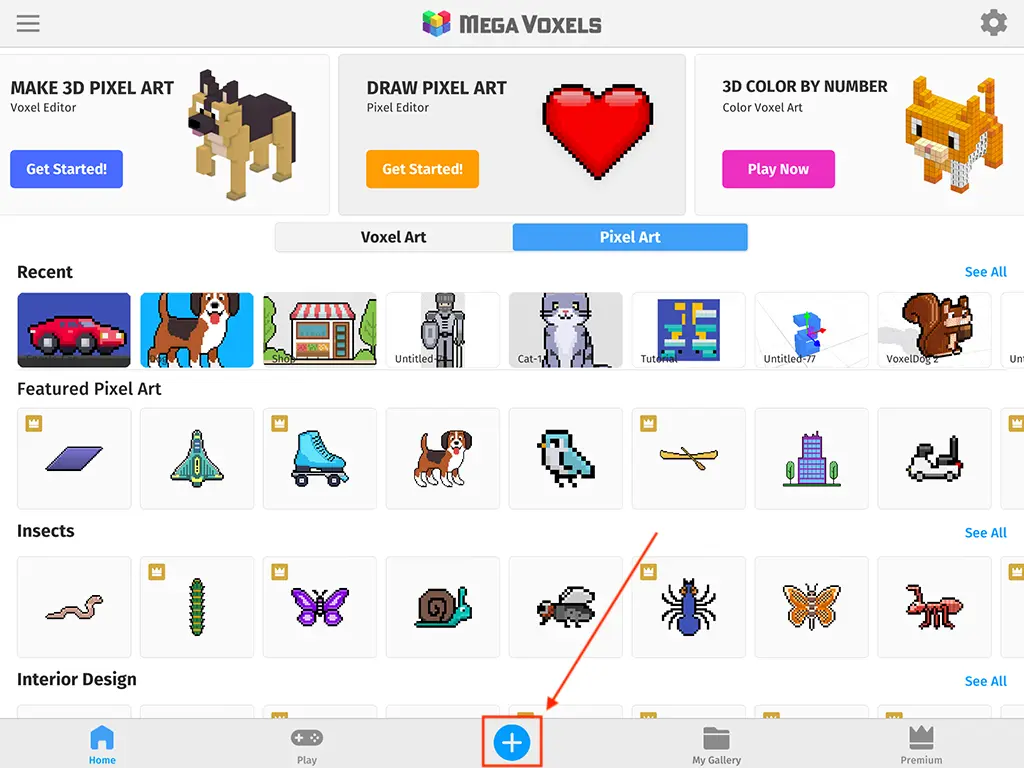
Let’s start by creating a new file so that you have a blank canvas to draw your pixel art. When you first open the app you will see a blank screen with a “+” toward the bottom. To create a new file tap this button and the Create New File menu will appear.
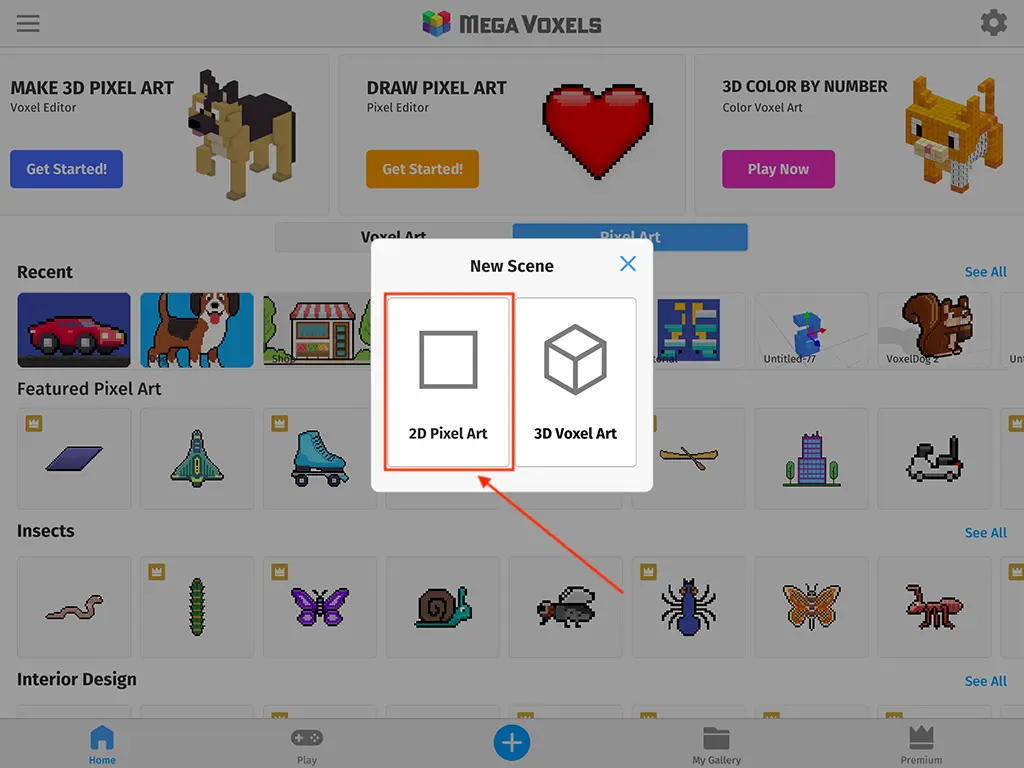
Once this new screen appears, it will give you the option to either create a 2D pixel art image or a 3D voxel art model. For this tutorial we will go ahead and tap the button on the left that says 2D Pixel Art.
Once selected, a new screen will appear asking you to give your new canvas a name. You can also specify the size and whether your starting grid should be on a transparent background or not. First enter the name “Star”. Then for this tutorial, enter the size of 32×32 for the grid. Lastly make sure that Transparent Background is selected because we want our grid to be transparent. When you’re done click Create.
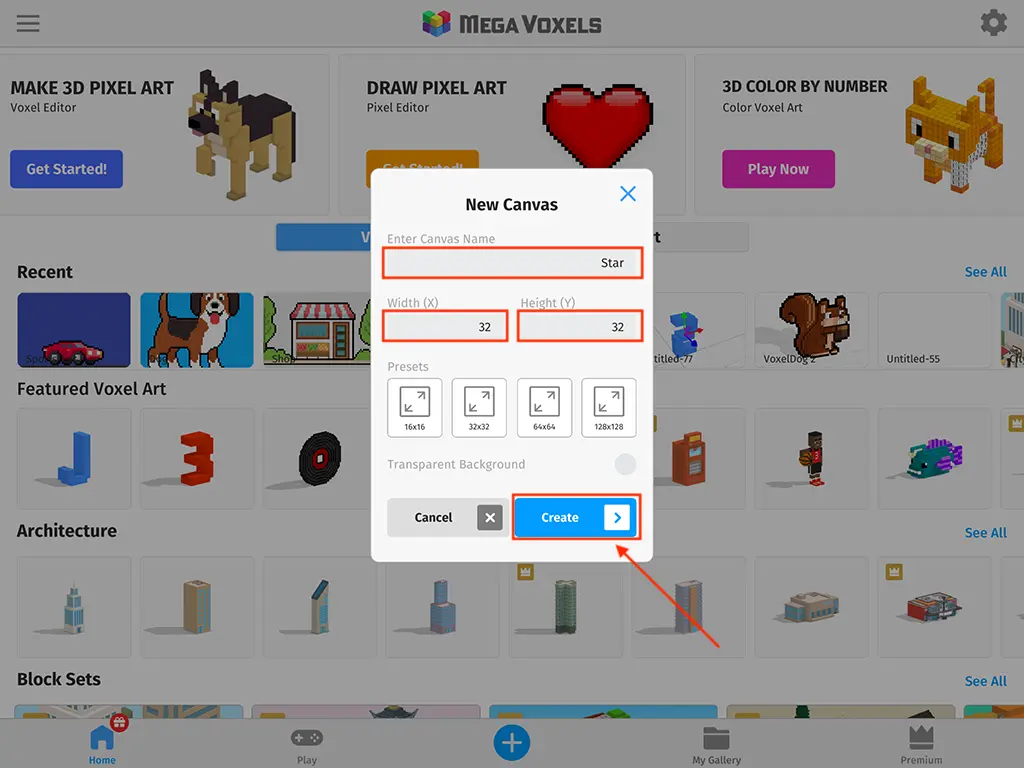
Basically this creates an empty canvas that is 32 pixels tall and 32 pixels wide. This canvas is where you will draw your pixel art star.
Drawing on the Canvas
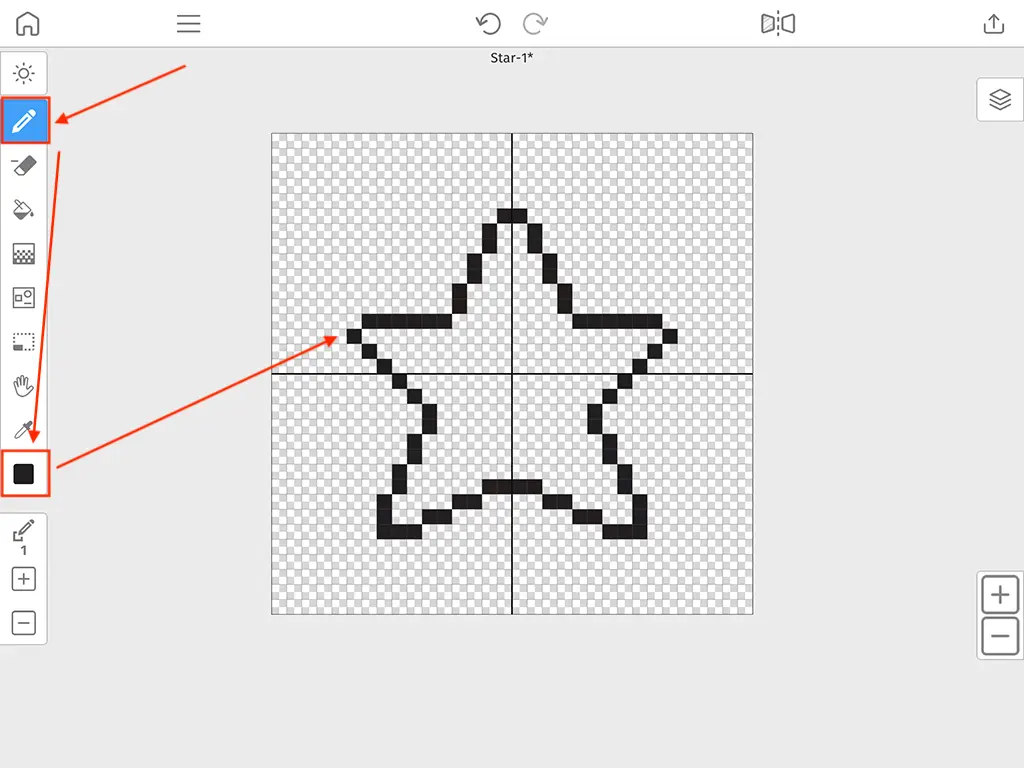
Now that we have our canvas set up and our file saved, we will begin by drawing the outline for our pixel star. First let’s select the pencil tool from the toolbar on the right. This tool will allow you to draw pixels to your canvas. Next, make sure you assign the color black using the color palette box inside the toolbar towards the bottom. Then simply tap on the canvas to draw a pixel. Try to match our outline of our star below.
Now that you have the outline for your pixel art star we will begin adding some color. Now technically you could manually draw every pixel inside of the star using the pencil tool, but there is a faster way to do this. For this next step we will introduce you to a new tool. The Paint Bucket tool lets you fill a region of pixels a specific color. In this example we will be painting the entire inside of the star yellow. To do this tap on the Paint Bucket icon inside of the toolbar. Then go ahead and select the color yellow in the Color palette window. Then simply tap inside of the outline you drew before.
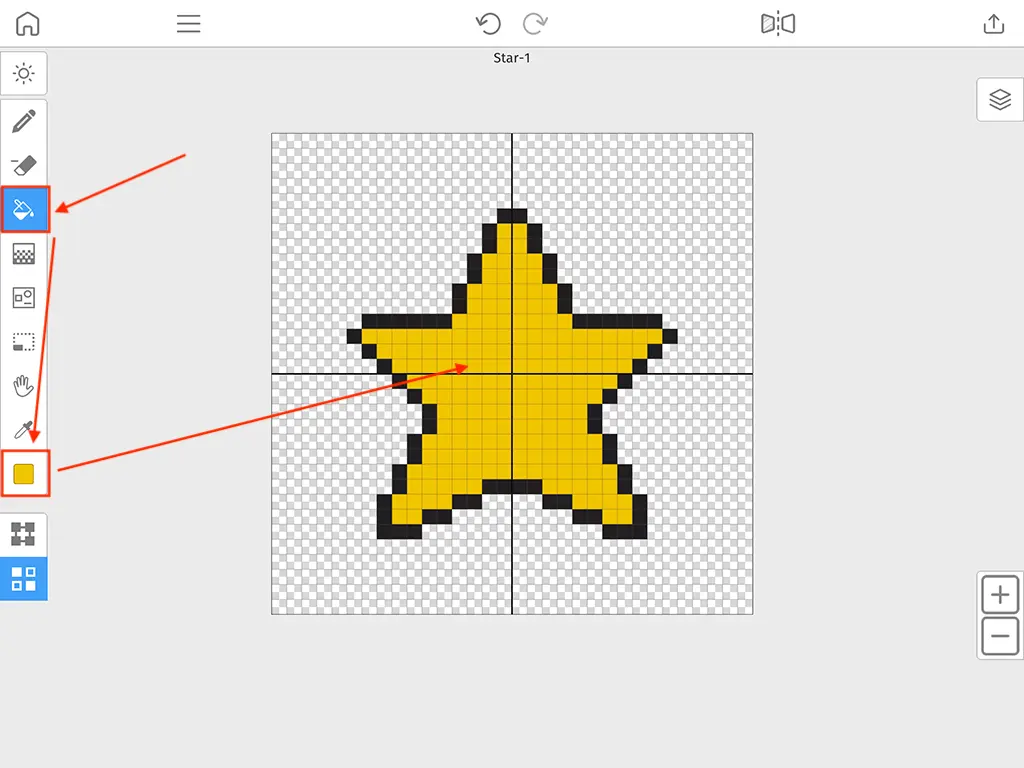
Awesome! Your star should now be yellow. Next up we want to add a shadow to our star to give it some depth. So let’s switch back to the Pencil tool and this time let’s select a darker yellow from the color palette window. Now draw along the bottom edges of the star. Use the image below as an example to follow.
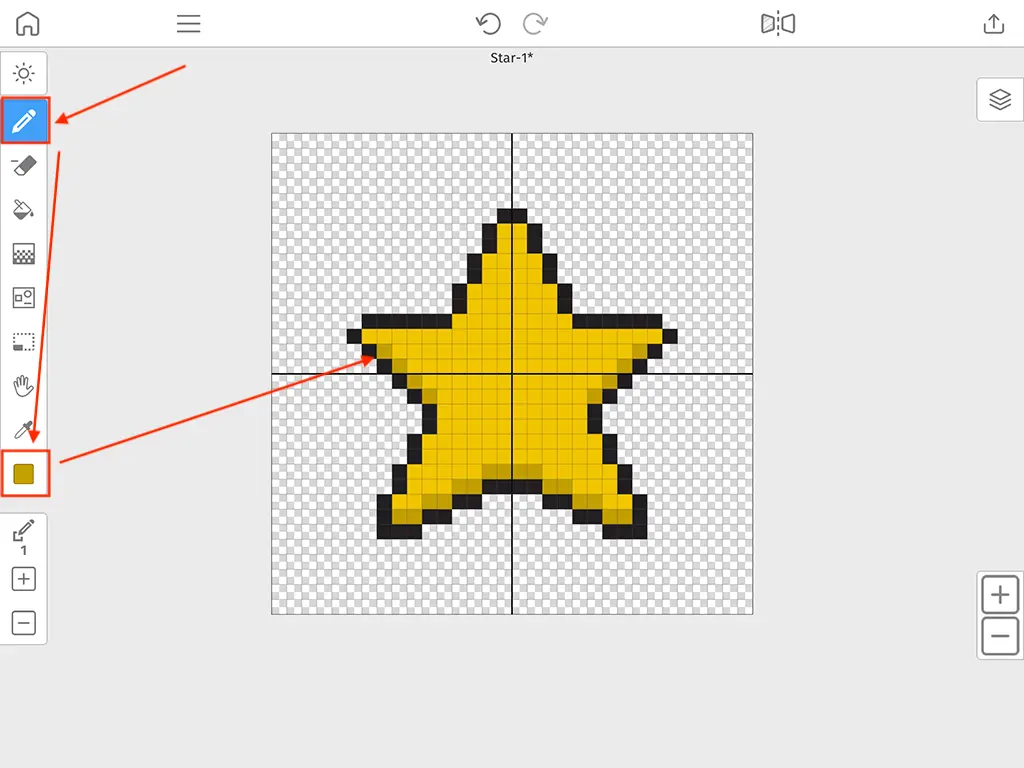
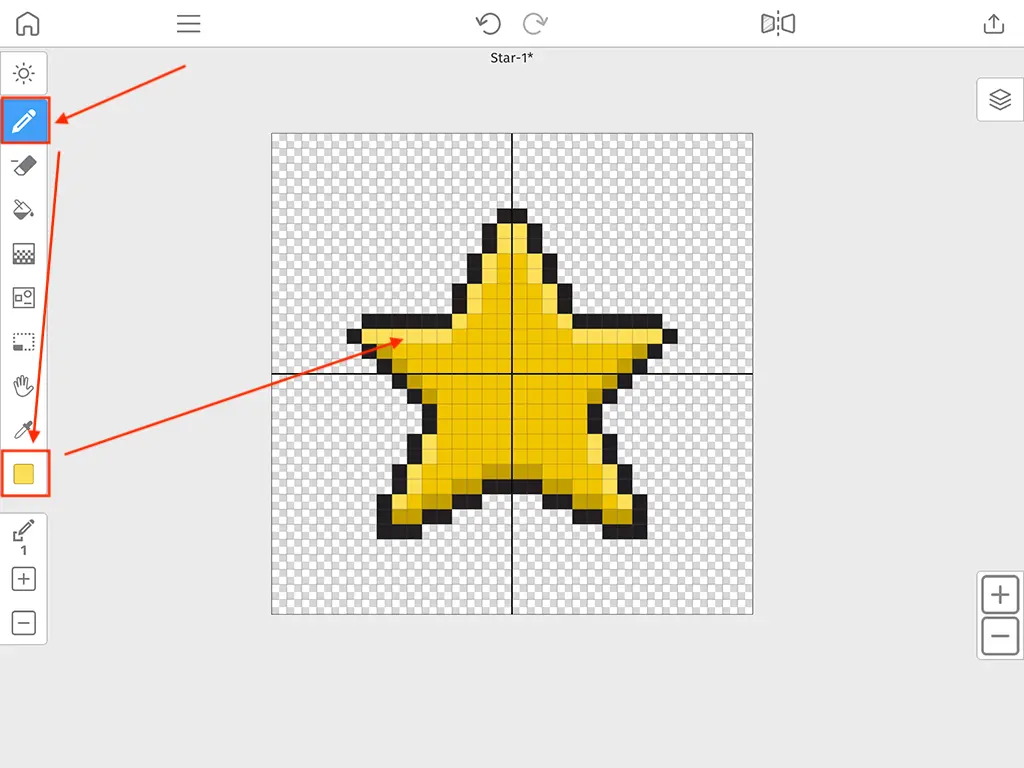
Very nice! The last touch we would like to do is to add a highlight. Again, make sure the pencil tool is selected, then go ahead and select a lighter yellow in the color palette window. We will draw on the top edges of our star.
Share your Pixel Art Image
Now that we finished the pixel art image, let’s see how we can export our star! The good news is that it is very easy. Tap the share icon on the top right of the editor. Immediately you’ll see a window like the one below.
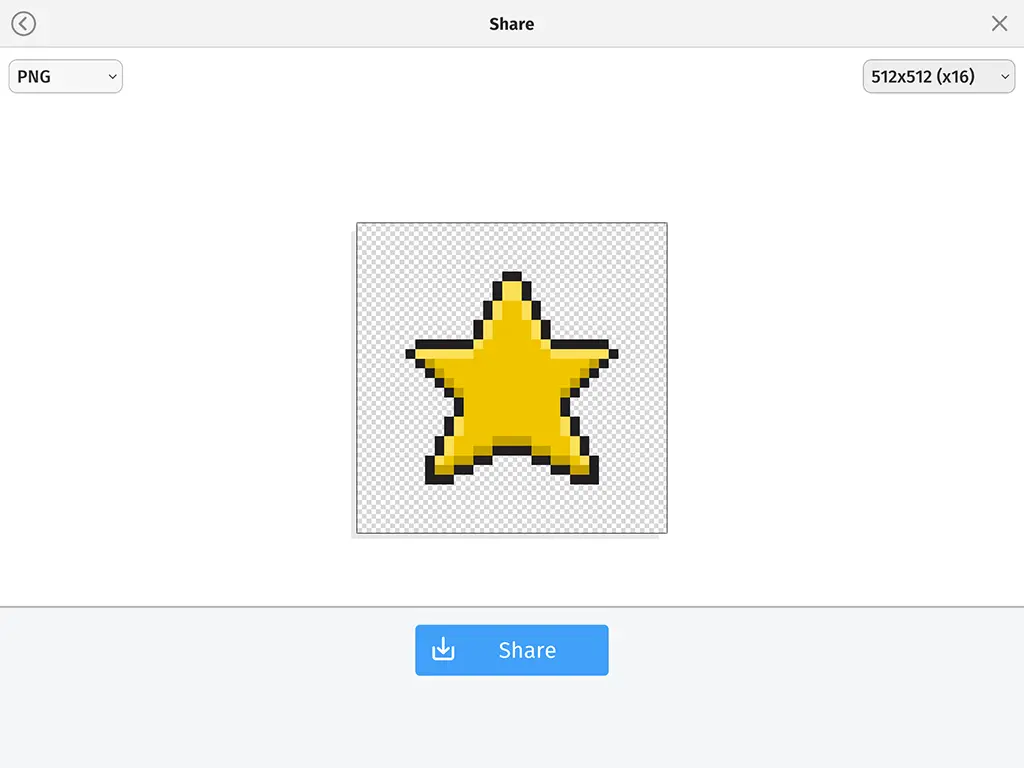
Starting at the top left is an option to choose the file type you want exported. You can select JPG or PNG. On the top right is the scale you want your image to be exported as. Keep in mind that pixel art by nature is very small so this is a very useful option if you plan on sharing your artwork to social media. Lastly is the share button at the bottom. This will allow you to access all the apps, social networks and even file systems on your device so that you can share your image to.
Success!
That’s it! Now you can draw your own pixel art image and share them where you like your own creation with the world! If you want to share your pixel art image with us for a chance to get a shout out on our page, tag us on Instagram or Facebook using @megavoxels or use the hashtag #megavoxels! We are always checking for new voxel artists everyday! If this post was helpful please considering sharing it! Have fun!


