Mega Voxels allows you to create models with a small amount of voxels, but it also supports joining smaller voxel models together to make bigger models with lots of voxels. In this tutorial, we will show you how to increase the size of your voxel model beyond the Mega Voxels size limit.
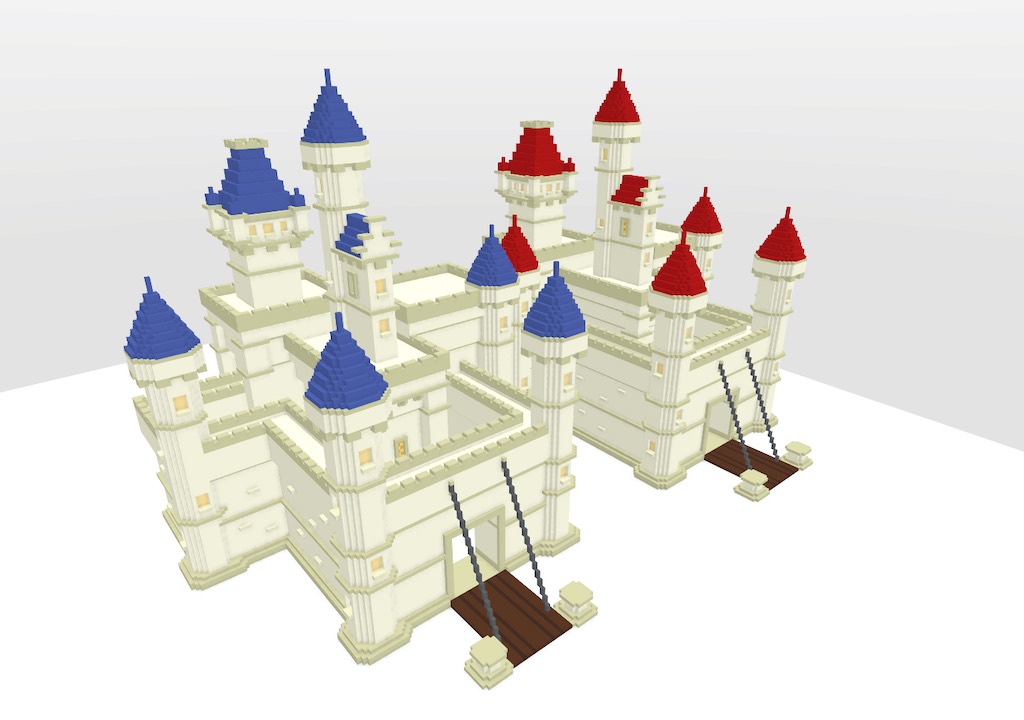
You may have noticed that a lot of voxel art featured on Mega Voxels is a lot bigger than the max size limit supported by Mega Voxels. You may be asking, how do I increase the MagicaVoxel size limit? As of this post, the current version of Mega Voxels only supports 126x126x126 sized models. Fortunately there is a great feature in Mega Voxels called the World Editor. We’ll be going through the steps on how to create multiple voxel models in a single scene, and use the World editor to combine them together to make a bigger model.
What is the Maximum Model Size in Mega Voxels
As of this writing, Mega Voxels only supports creating models with a max size of 126x126x126. There is a future update in the works that will allow models of 256x256x256 to be created but as of right now the limit is currently 126x126x126.
So how do artists get around this limitation and create massive looking scenes? The answer is actually quite simple. To increase the max size in Mega Voxels use the World Editor to combine multiple models, also called grids, together making a scene that is much larger than the max size.
Working in the World Editor
To begin open the scene file that you would like to work with. For this tutorial we used a massive voxel model that you can find in the shop. This model is the max size supported by Mega Voxels which is 126x126x126. We will be creating a second castle in the same scene to show how to bypass the max size requirement.
By default when you open a file you are already inside of the World Editor. The World editor allows you to move your models around, rotate them, delete them and more! In this case we will be duplicating our castle model. By doing this we will essentially be creating a scene that is twice the limit. To do this simply select the model and tap the Duplicate button.
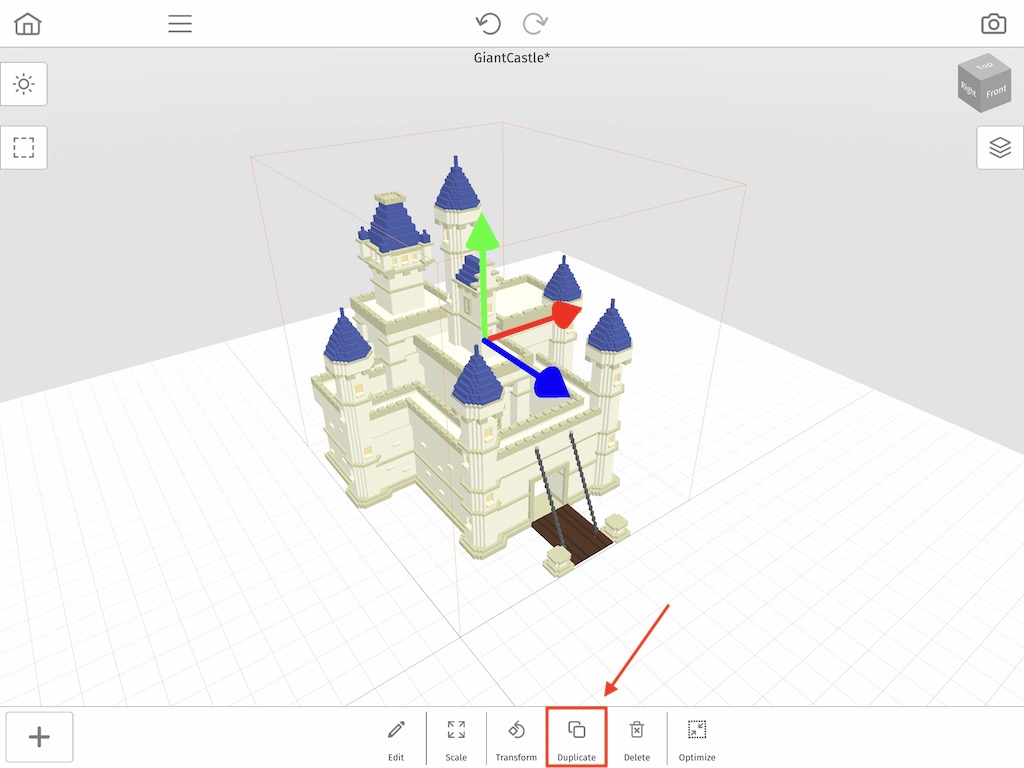
When you tap the Duplicate button it will add another duplicate of the castle model into your scene. This new model is completely independent from the original. To emphasize this concept, we edit the second the model in the next step.
Editing the Second Model
Now that you have two models in the same scene go ahead and tap on the second model and then tap the Edit button.
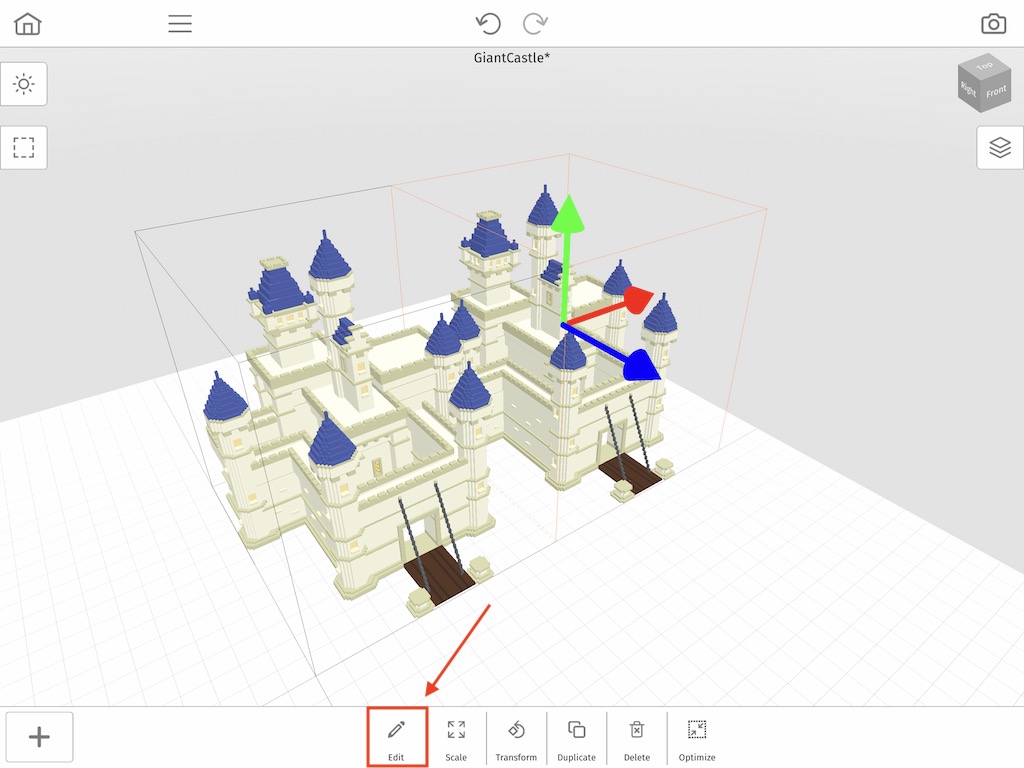
You may have noticed that the screen interface has changed. You are now in the Model editor. This is where you can modify the model itself like adding voxels and painting voxels different colors.
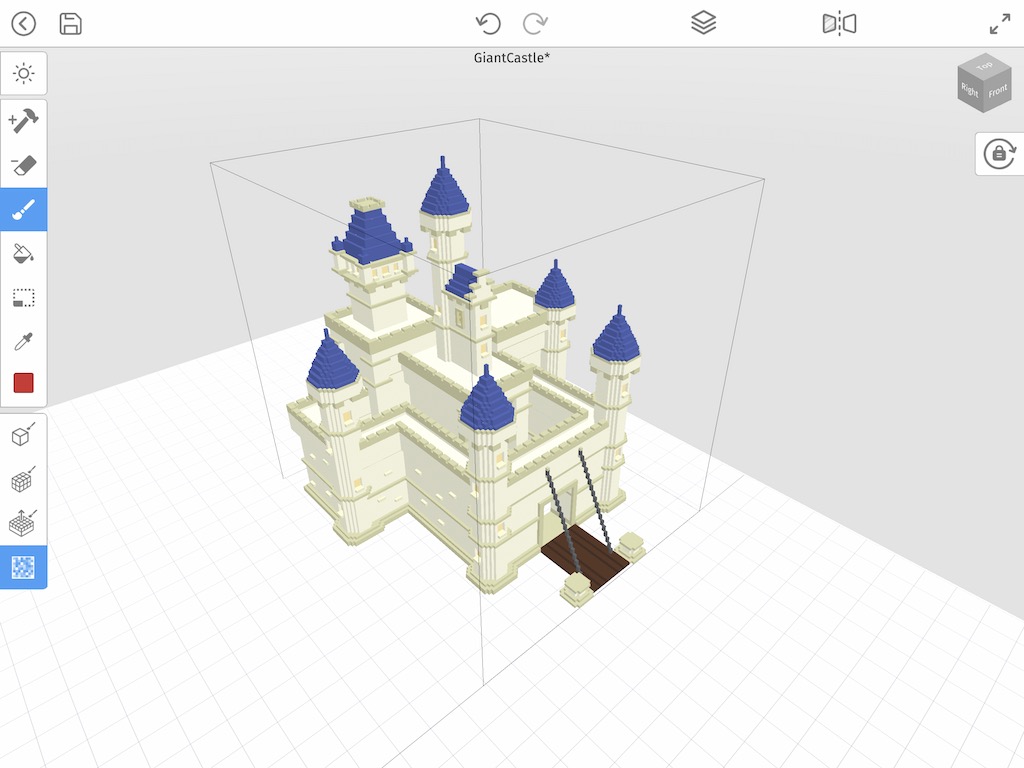
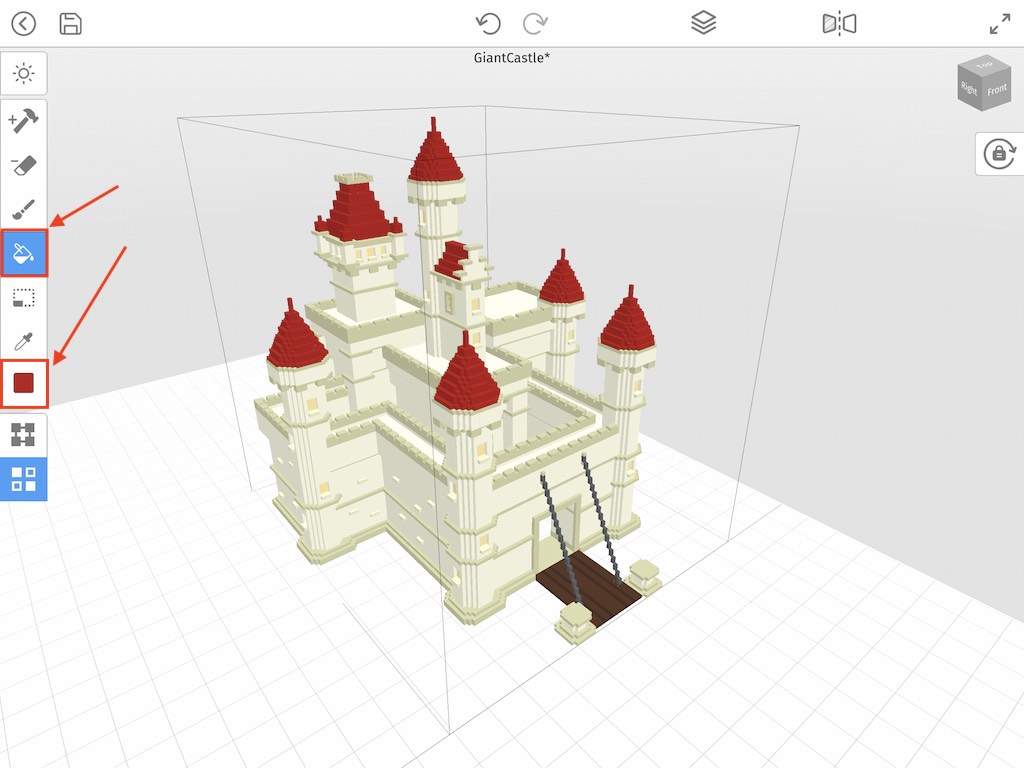
Go ahead and feel free to modify the castle however you like. For this example we did something simple and decided to use the Bucket Fill tool and color the roofs red instead of blue. The tools we used are highlighted in blue.
When you are done editing your model tap the back arrow on the top left of the editor to return back to World Mode. Congratulations, you have now added two models to a single scene which adds up to 256 voxels wide. Here is the result!

Wrap Up
This simple technique is the starting point for creating huge voxel worlds with dozens of voxel models and still abiding by Mega Voxels size limit. If you have any questions please ask below. Also if you found this tutorial helpful, please consider sharing.
We created a video version of this tutorial on Youtube if you would like to watch the full process.
